Showing posts with label root. Show all posts
Showing posts with label root. Show all posts
Monday, April 6, 2015
How To Root XOLO A500S
XOLO A500S is a dual SIM device with Dual Standby. It has a display of 4 inches with 480 x 800 pixels (16m colors support). You get 512 MB RAM with this handset which is I think less for the gamers and okay for normal users. It is clocked @1.3 GHz and thats good. The device is having MediaTek MT6572W Dual Core Chipset (Cortex A-7) which is clocked @1.3 GHz. After seeing the specifications, I think the benchmark of XOLO A500s would be 8k~10k, not more than that. The GPU provided with this device is cool, yeah. There is a Mali-400 GPU fitted in this device for gaming and better frame-per-seconds which will make your videos run like a butter, even HD videos. With the 512 MB RAM, you get 4 GB Internal Storage (2GB for SD Card, 700 MB for applications and other storage for data partition). The device is running on Android 4.2 Jelly Bean with 3.4.5 Kernel. Theres a 5 Mega Pixels camera at the back of this device which is clear and clicks nice pictures with 2592 х 1944 pixels and LED flash which can record upto 720p HD videos and a front VGA camera. You record and get 30fps (Frames Per Second) in videos.
 |
| Credits for the picture: GSMArena |
You can root XOLO A500S easily with Framaroot application which is free to download and you just need to simply install it in your mobile and just click root it! Simple? I know that its very simple and even newbies perform these easy steps.
Requirements
- XOLO A500s
- 60-70% of battery before trying this.
- Framaroot Application (the link given at the downloads section)
- USB Debugging Enabled: Go to Settings, open About Phone. After about phone, tap 7 times on Build Number, when you will complete your taps, you will get a popup you are a developer now. Now, go back and open Developer options and enable it. After enabling Developer options, enable USB Debugging.

- Unkown Sources enabled: Go to Settings, then open Security. Now tick Unkown sources and click yes to the warning.

Downloads
- Framaroot 1.6.0 Application: Click HERE. (Only use Framaroot 1.6.x Application while Rooting MediaTek devices!!!!! Other versions wont work in rooting MediaTek devices)
How To Root XOLO A500S
- Download the application from your computer or your mobile phone.
- Move it to your SD Card (External)
- Install it into your device [If you will get a warning message, then click yes and tick Unkown Sources.]
- Open the Framaroot Application.

- Select SuperSU.
- Click on Boromir exploit.

- You will get a popup Success :-) ... Superuser and su binary installed. You have to reboot your device after some time. If you got this message then this means youre rooted now!
- Reboot!
You will see SuperSU application installed in your Android device. You can see the application in your launchers application drawer. If you are not sure that your device is rooted or not then check this by Root Checker application from Google Play Store, its for free.
Are you having any problems while rooting your XOLO A500S? If yes then comment here with your problem. I will help you for sure :)
See a simple video made by me on YouTube, its very easy and especially made for XOLO A500S users with ease.
See a simple video made by me on YouTube, its very easy and especially made for XOLO A500S users with ease.

How To Root Micromax A119 Canvas XL Without PC
My friend recently bought Micromax A119 Canvas XL and asked me to root it for him, I googled about the chipset and found that it is MediaTek MT6582 and I was ready to root the device because I knew that it can be rooted by using Framaroot Application.

The rooting was easy and I also built CWM recovery for him. After rooting his device I thought of making a guide on rooting micromax a119 canvas xl. The guide is really very simple and doesnt require any kind of skills. Even a noob can perform this guide easily. Requirements are just simple things like an application, mobile phone and no computer so users that dont have computers and laptops at their homes can also perform these steps.
The device is very big and has decent specifications, but whats the need to root it? I am sure you are thinking this on your mind but let me tell you that there are some things that you wont get in simple device which is not rooted like Xposed Module, Root Explorer, MobileUncle MTK Tools and other tools which can customise your mobile phone.
I installed my own made Carliv Touch recovery in it and tried many zips like Init.d enabler, Xposed uninstaller and etc. zips to check if it was working or not.
Lets no more talk about what I did and root your Micromax A119 Canvas XL! Here you go:
Requirements
The rooting was easy and I also built CWM recovery for him. After rooting his device I thought of making a guide on rooting micromax a119 canvas xl. The guide is really very simple and doesnt require any kind of skills. Even a noob can perform this guide easily. Requirements are just simple things like an application, mobile phone and no computer so users that dont have computers and laptops at their homes can also perform these steps.
The device is very big and has decent specifications, but whats the need to root it? I am sure you are thinking this on your mind but let me tell you that there are some things that you wont get in simple device which is not rooted like Xposed Module, Root Explorer, MobileUncle MTK Tools and other tools which can customise your mobile phone.
I installed my own made Carliv Touch recovery in it and tried many zips like Init.d enabler, Xposed uninstaller and etc. zips to check if it was working or not.
Lets no more talk about what I did and root your Micromax A119 Canvas XL! Here you go:
Requirements
- Framaroot 1.6.1 APK: Get it from Framaroots official thread which is available on XDA-Developers.com.
- Micromax A119 Canvas XL with USB Debugging Enabled: Go to About phone in Settings and tap 7 times on Build Number. After tapping 7 times you will see a popup that you are a developer now!
Go back and there will be a new option named "Developer options" in Settings application. Open it and enable it. Enable USB Debugging too. - Micromax A119 Canvas XL charged upt to 70% for performing this guide.
- Concentration required a bit.
Downloads
- Framaroot APK: Get it from Official Framaroot Thread: Click HERE.
- Nothing else.
How To Root Micromax A119 Canvas XL without PC
- Enable USB Debugging (see how to do it in Requirements).
- Download Framroot Application on your mobile phone. If you are installing application like this on mobile phone, then move it to your SD Card, tap on it and you will see a warning, accept the warning and install the application on your XL.
- Close all the applications and save your works because we will need to reboot it after some seconds.
- Now, open Framaroot Application from your application drawer when everything is closed.
- Click on Superuser and tick SuperSU from the drop-down list. (You can try Superuser too but I found SuperSU better than superuser.)
- Click on Boromir exploit to root your Micromax A119 Canvas XL.
- You will see Success :-) ... Superuser and su binary installed. You have to reboot your device message in a new popup from that application.
- Reboot your device now!
IF you didnt see that messaage then you have installed any other version of that application. If you are still not sure that the device is rooted or not then try any free applications like Root Checker which can be downloaded free from Google Play Store.
Watch this video made by me on how to root Micromax A119 Canvas XL on YouTube for pictorial guide to enable USB Debugging etc.
If you are having any problems related to the rooting tutorial or anything that shoot a comment here for help! We always reply to you.
Watch this video made by me on how to root Micromax A119 Canvas XL on YouTube for pictorial guide to enable USB Debugging etc.
If you are having any problems related to the rooting tutorial or anything that shoot a comment here for help! We always reply to you.
Friday, April 3, 2015
How To Root Nokia X Easily without PC
Nokia X is a latest Android device till now, which is launched by Nokia.
It has some good specifications and some bad specifications. The development of Nokia X is not that much high which we expected, but still it is awesome. The good news is that, the device has been rooted and has been flashed with the Stock ROM, GApps and other things. Today, I am going to show you how to root your Nokia X and not how to flash stock rom in Nokia X or anything like that.
x
You can flash Google Applications, CyanogenMod ROM, MiUi and other MODs, ROMs from ClockWorkMod Recovery, but to install ClockWorkMod Recovery in your Nokia X, you must root your Android device!
Rooting Nokia X is very easy because it has SnapDragon, which can be easily rooted by Framaroot application. You dont need to worry about any kind of brick. Just some seconds and you are rooted. Cool, isnt it?
Nokia X has a 4 inch IPS LCD Capacitive touchscreen with 480 x 800 pixels and 233 ppi pixels density. The display of this device has nothing special. The internal memory of Nokia X is 4 GB which is very common in the devices these days, and has 512 MB RAM in it. Ah, gaming phone? NO. It has been flashed with Android 4.1.2. The device has Dual-core 1 GHz Cortex-A5 CPU with Qualcomm MSM8225 Snapdragon S4 Play chipset, which is the good part of this device. For graphics and gaming, this device is stuffed with Adreno 203, which wont give you the playback which you actually needs. Also, the gaming performance will be low in this device. It has a 3.15 Mega Pixels camera which captures nice pictures and records video @30 FPS on 480p.
I will not talk about the specifications much, because I am anxious to show you How To Root Nokia X without PC!
Lets move to the requirements and all.
Prerequisites to root Nokia X
It has some good specifications and some bad specifications. The development of Nokia X is not that much high which we expected, but still it is awesome. The good news is that, the device has been rooted and has been flashed with the Stock ROM, GApps and other things. Today, I am going to show you how to root your Nokia X and not how to flash stock rom in Nokia X or anything like that.
x
You can flash Google Applications, CyanogenMod ROM, MiUi and other MODs, ROMs from ClockWorkMod Recovery, but to install ClockWorkMod Recovery in your Nokia X, you must root your Android device!
Rooting Nokia X is very easy because it has SnapDragon, which can be easily rooted by Framaroot application. You dont need to worry about any kind of brick. Just some seconds and you are rooted. Cool, isnt it?
Nokia X has a 4 inch IPS LCD Capacitive touchscreen with 480 x 800 pixels and 233 ppi pixels density. The display of this device has nothing special. The internal memory of Nokia X is 4 GB which is very common in the devices these days, and has 512 MB RAM in it. Ah, gaming phone? NO. It has been flashed with Android 4.1.2. The device has Dual-core 1 GHz Cortex-A5 CPU with Qualcomm MSM8225 Snapdragon S4 Play chipset, which is the good part of this device. For graphics and gaming, this device is stuffed with Adreno 203, which wont give you the playback which you actually needs. Also, the gaming performance will be low in this device. It has a 3.15 Mega Pixels camera which captures nice pictures and records video @30 FPS on 480p.
I will not talk about the specifications much, because I am anxious to show you How To Root Nokia X without PC!
Lets move to the requirements and all.
Prerequisites to root Nokia X
- Dont download anything else which is not stated here, in this guide.
- You dont need PC or anything else to root your Nokia X.
- Dont shut this device off while the process is being done.
- Make sure your Nokia X is charged up to 70% before you move to rest of the guide.
- This rooting tutorial may or may not work with Nokia X+ or Nokia XL, but you can try. It wont brick your device.
Downloads
- Framaroot 1.9.1 Application.
- Nothing else.
How To Root Nokia X
- Download the APK from your computer and move to your SD Card via USB or Bluetooth or download it from mobile phone itself.
- Go to the settings of Nokia X, and select Applications from the main list. Open it and enable Unkown sources.
- Go to your File Explorer and tap on the application.
- It will display a waring to install the application or not. Just tap on OK.
- The application will be installed into your device soon.
- Close everything (just swipe left or right in the Recent application panel).
- Open the appliaction from your application drawer [Its name will be Framaroot].
- Select Superuser and from the drop down list, select SuperSU or if the SuperSU is already select then follow the next step.
- Click on Gandalf exploit to root your Nokia X.
- Reboot your Nokia X to take the effects.
Your Nokia X is rooted now! You can confirm it by using any application which requires root or by Root Checker application. You can download the application from Google or Nokia Store.
If you have any doubts, then please clear them here! I am there to help you.
Heres the source from which we got to know about the rooting tutorial of Nokia X: HERE.
You can see my YouTube video on rooting Nokia X, X+ and XL! This video is simple and can be viewed on 720p without lagging!
Heres the source from which we got to know about the rooting tutorial of Nokia X: HERE.
You can see my YouTube video on rooting Nokia X, X+ and XL! This video is simple and can be viewed on 720p without lagging!
How To Root Huawei Ascend P6 Best Way
Huawei Ascend P6 is one of the best Android device in the market because of its features. Ascend P6 is the most slimmest Android phone in the market! The designs of this device are killer. Edge cutting edges, cool slim width, nice curves etc. The device is not only good in terms of outer looks! The beast is having excellent specifications which were not expected. Huawei Ascend A6 has 2 GB of RAM, which is more than enough for even hardcore gamers. You get a big 4.7 Inch IPS display, and thats descent. The speed of processor doesnt match the RAM! You get just 1.5 GHz Quad Core processor, thats good but you can get it even in a device with 512 MB RAM and 1 GB RAM so it should be 1.7 or 2 GHz Quad Core, anyway, its still awesome. Within a week, the device got over millions of purchases because of its features. In less than 2 days, developers rooted this great Android device.
There are many ways to root Huawei Ascend P6 but I will show you most easy one. The Root Wizard is very easy to do and I will be showing you that only.

Requirements and Downloads


There are many ways to root Huawei Ascend P6 but I will show you most easy one. The Root Wizard is very easy to do and I will be showing you that only.
Requirements and Downloads
- Ascend P6 USB Drivers- Click HERE to Download.
- Root Wizard Rooting Tool- Click HERE to Download.
- USB Debugging enabled in P6 [Guide given below]
- USB Cable
- Computer
- Ascend P6 with over 70% battery
How To Enable USB Debugging in Huawei Ascend P6-
Huawei P6 is running o Android 4.2.2 and the USB Debugging [Developer Option] is hidden from the settings for some security reasons, you can easily enable it with this guide:
- Open the "Settings" Application from Application Drawer of the launcher.
- Scroll down with your maximum power to get to the bottom of the list.
- Now, again scroll down and you will find Build Number in the list.
- Tap on "Build Number" 7 times rapidly.
- Go back in the main screen of Settings.
- You will see a new option named "Developer Options" above "About Phone".
- Open the "Developer Options", scroll down and enable "USB Debugging".
Now, you can close the settings application. It has nothing to do with it what we will do now.
How To Root Huawei Ascend P6-
- Download the Drivers from the link given in the "Downloads" section and install it.
- Now, install the "Rooting Wizard" from the above URL and install it into your computer.
- Reboot your PC [It wont work instead.]
- Now connect your P6 with USB to your computer and it will display some popups and will play some sounds.
- Open the Root Wizard Tool again. If it shows updating, then cancel the update by pressing "Cancel" button.
- Now click on Green big "Next" button.
- Now click on Green Button. It will soon connect to your device and will display it in bottom-left of the screen. Your P6 will be rooted within some seconds! Now you can enjoy recoveries, ROMs!
Now reboot your device and it will be rooted! You can verify by applications like "Root Checker"
Hope you liked this guide tutorial and you successfully rooted your P6, if you rooted it successfully, comment below.
Still having problems? Shoot a comment below!
Buy this mind blowing device from Flipkart at cheap rate.
Huawei Ascend P6 at only 25 thousands from@FlipKart:
Buy this mind blowing device from Flipkart at cheap rate.
Huawei Ascend P6 at only 25 thousands from
How To Root Micromax Canvas Juice A77
Micromax Canvas Juice A77 is latest Canvas device by Micromax till now. It was released just some days ago and is getting too much demand. This is because of its features and price. You might be thinking why the device is too cheap? Actually, its using MediaTek MT6572 Chipset which is very cheap and thats why the price is also less. If it had other MT chips like MT6577, MT6589 etc. it would be above 10 thousands. Ive explained MediaTek MT6572 pros and cos in this post. Micromax A77 Juice has a big 5 Inch screen with 854*480 pixels. The device is running on Android 4.2.2 Jelly Bean OS. You get 1 GB RAM in this Cwhich is too much for this type of this device. No, not 1 GHz, not not 1 GHz Dual, no not 1.2 GHz Dual Core! Its running on MediaTek MT6572 1.3 GHz Dual Core processor! Okay lets see the specifications list of Canvas Juice.

Specifications of Micromax Canvas Juice A77
- 5 Inch Capacitive Touch screen with 854*480 resolution
- 4.2.2 Jelly Bean OS
- MediaTek MT6572 1.3 GHz Dual Core Processor
- 1 GB RAM
- 5 Mega Pixels rear camera and VGA front camera
- Dual SIM support [Dual Standby]
- 3000 mAh Battery
So, I think the device is good and the buyers are happy. Lets make you more happy with the rooting guide.
I am the first to write rooting guide for Canvas Juice and Im sure it will work. You can trust me! Now lets see the requirements, prerequisites and downloads
Requirements
- Canvas Juice A77 charged up to 50%
- Framaroot Application, download link given below
- USB Debugging Option enabled [To Do This follow this: Open Settings Application, scroll to end and select About Phone. Now again scroll down to last and tap 7 times on Build Number till you see You are a developer now! message. Go back to the main settings and you will see a new option named Developer Options. Open it and enable it. Now search for USB Debugging and enable it also]
- Unknown Applications installation- Open Settings and go to Security Options. Now mark Unknown Sources.
Downloads
- Framaroot Application- Framaroot v1.6.2.apk.
Note: Always use Boromir exploit to root MediaTek MT6572 devices. Framaroot 1.6.x = Boromir.
How To Root Micromax Canvas Juice A77
- Download the Framaroot application from the computer and move it to your SD Card.
- Open any file manager [say ES File Manager] and click on Framaroot Application. Click on Install it.
- Open the application from the drawer of launcher and select Framaroot there.
- Now, Framaroot will open.
- Click on Boromir and tick Super SU.
- You will see a successful message which will say Success :-) ... Superuser and su binary installed. You have to reboot your device. If you saw this message, then you are rooted successfully.
- Reboot your device to check if Juice A77 is rooted or not.
As, I said, if you saw that message then it means you are rooted but you can double check if youre rooted or not by some applications like Root Checker from Google Play Store.
Any problems? Ask me here. Im here for you.
Problems while rooting your Android Device? Join MMX Canvas Juice A77 Development and Gaming group on Facebook to get help from other developers! Click HERE to join it now.
Still not able to root your device? Follow the video:
Problems while rooting your Android Device? Join MMX Canvas Juice A77 Development and Gaming group on Facebook to get help from other developers! Click HERE to join it now.
Still not able to root your device? Follow the video:
Thursday, April 2, 2015
How To Root Micromax A210 Canvas 4
Micromax Canvas 4 is the most recent discharge a device from the house of micromax, likewise its the most unmanageable (too much expensive!) phone by micromax cost arround 17 thousands. Despite the fact that it take as a high end phone yet theres nothing unique in it, I mean the Canvas HD is having almost same specifications, then why to buy this expensive device. Its only a device with same specifications as of Micromax A116 Canvas HD which is blotwared with some apps like air screen, unlock, air gestures and so forth. The performace of the device is also almost same like of Canvas HD but after rooting the device, you can increase the performace of the device by using some applications and mods like Greenify, Kings Booster, Seeder etc. but note that there will be not too much effect on the device because they will just increase the raw performance. Even rough performance is good means it can remove some lags while playing games and multitasking. First of all, lets see the specifications of this device.
Micromax A210 Canvas 4
 |
| Credits goes to the Mobile Indian |
Micromax A210 Canvas 4
- Dual SIM support (Dual Standby)
- Android 4.2.1 Jelly Bean OS
- 5.0 inch IPS LCD capacitive touchscreen, 16M colors with 720 x 1280 pixels (HD Display!) and 294 ppi protected by Corning Gorilla Glass
- Quad-core 1.2 GHz Cortex-A7 Mediatek MT6589 processor
- PowerVR SGX544 GPU
- 16 GB (10 GB user available) internal storage which can be further expanded up to 32 GB
- 1 GB RAM
- 13 Mega Pixels camera with autofocus, LED flash, Geo-tagging, touch focus, face and smile detection, HDR, panorama etc. which can record up to 1080p HD videos @30 fps (Frame Per Seconds) and a 5 Mega Pixels camera which can record up to 720p HD videos
- WiFi, WiFi Hotspot, Bluetooth v4.0, microUSB v3.0, HTML 5
- 2000 mAh Battery
The specifications are good but I think the price point (17 thousands) is too much for this device. You can get the same device with same specifications at cheap rates from Karbonn, Lava, XOLO etc. but nothing too bad about this device, you cannot get 5 Mega Pixels front camera which can record 720p HD videos etc.
Prerequists
- Dont try this rooting guide on any other device except Micromax A210 Canvas 4 because it can brick your device!
- Dont mix any other guide with this guide, I mean follow this guide only.
- Dont remove the cable while the process.
- Before trying this guide, make sure your device is charged up to 70%.
- Turn ON USB debugging : Go to setting [from the application drawer] > About Phone, there scroll to the last and youll see a About phone section. Open it and tap 7 times continuously on Build Number to unlock the Developer Option. Now back to setting menu > developers option > USB debugging > Turn it on.
Downloads
- MOTOCHOPPER- Click HERE
- PDANet [Install it, and select others when it will come to the manufacturing company. And dont close it while the rooting process, you can uninstall after this!]
How To Root Micromax A210 Canvas 4
- Download the MOTOCHOPPER rooting toolkit from the link given above.
- Extract MOTOCHOPPER in any folder [Say Desktop/Rooting].
- Connect your Canvas 4 with USB.
- Install PDANet and install it by following that guide.
- Open the folder in which you extracted those files.
- Right click on the file named RUN.bat and select Run as Administrator.
- Now a black window (command prompt) will open with some text which will be about who made it and all, so just press Enter.
 |
| Credits goes to me for capturing this picture. |
- It will root your device, dont remove the USB cable untill its finished.
- After the process completes, reboot your device again.
After the reboot, youll see a new application installed in to your device [in application drawer] named Superuser. If you found it, then youre rooted.
Not sure if youre rooted or not, then install and check by Root Checker application. You can download it free from Google Play Store.
Saturday, October 4, 2014
How to root the HTC One
The HTC One is a massively popular phone -- so popular that its manufacturer is struggling to keep up with demand. Should you be lucky enough to own this blisteringly fast Android powerhouse, then youve no doubt already marvelled at its terrific screen, punchy stereo speakers and solid build quality. If all of the Ones built-in features are still not enough to satisfy you, then perhaps youre ready to take your handset to the next level -- and that means getting root access.

Root access allows you to do all kinds of amazing things, such as installing custom firmware, removing stubborn applications and generally gaining more control over your device. Like so many things in life, rooting isnt without its risks. Tampering with your phones software invalidates your warranty, and if something goes wrong during the procedure you could end up with an expensive paperweight. As always, we can take absolutely no responsibility for any damage or loss of data that may occur from following this guide.
Mercifully, the process outlined below is pretty foolproof and weve already tested it ourselves, so assuming youre still brave enough, lets get down to business. The guide assumes youre using a Windows-based PC.
To root the HTC One youll need to unlock the phones bootloader. This wipes everything on the handset, so make sure youve already backed up all of your valuable data, such as photos, videos and audio. Once you move onto the next step, youve got to be prepared to lose it all.

Before you can do any rooting, youll have to unlock the HTC Ones bootloader. Visit HTCs dev site and register, if you havent already. Follow the steps provided to place your phone into Fastboot mode and request the device ID token required to perform the unlock. Youll need the latest version of the Android SDK to do this, so make sure youve downloaded it beforehand.
Once youve got the token, youll need to input it into the HTC dev site, after which point youll get the code used to unlock the phone, plus instructions on how to do it. During the unlock process youll need to place all related files in a folder. Make sure you place it on your desktop, as youll be putting more stuff in there as part of the next step of the guide.

Grab the latest version of TWRP recovery (currently 2.5.0.0) and place it in the same folder where you downloaded the previous files.
Youll need to regress to the world of MS-DOS for this next bit, which might bring back unhappy memories for anyone over the age of 30. Open up the Start menu in Windows and type "cmd" and press enter, then use "cd/desktop/xxxxx" (with the "xxxxx" being the name of the folder) to navigate to the folder where you previously downloaded all the files.

Youre prepped PC-side, but now you need to make sure your HTC One is ready for the rooting process to begin. Place the phone into Fastboot mode by turning it off completely and then holding down the Power and Volume Down buttons. Select Fastboot using the volume rocker and press the power button to select it. Now connect your phone to your PC using a Micro-USB cable.

In the command prompt, type "fastboot flash recovery twrp.img". The TWRP recovery will then be flashed to your phone. After this has completed, restart your phone.
Download the SuperUser application from here and copy it to the root of the phones internal memory. To install it, youll need to boot the phone into recovery mode. Switch off the handset and hold down the Power and Volume Down buttons again. Navigate to Recovery and press the power button. From the next menu, tap Install and then select the SuperUser.zip file you copied across earlier. Once that process is complete, reboot your freshly rooted HTC One and enjoy.

Read more »
Root access allows you to do all kinds of amazing things, such as installing custom firmware, removing stubborn applications and generally gaining more control over your device. Like so many things in life, rooting isnt without its risks. Tampering with your phones software invalidates your warranty, and if something goes wrong during the procedure you could end up with an expensive paperweight. As always, we can take absolutely no responsibility for any damage or loss of data that may occur from following this guide.
Mercifully, the process outlined below is pretty foolproof and weve already tested it ourselves, so assuming youre still brave enough, lets get down to business. The guide assumes youre using a Windows-based PC.
1. Back up your phone
To root the HTC One youll need to unlock the phones bootloader. This wipes everything on the handset, so make sure youve already backed up all of your valuable data, such as photos, videos and audio. Once you move onto the next step, youve got to be prepared to lose it all.
2. Unlock the phones bootloader
Before you can do any rooting, youll have to unlock the HTC Ones bootloader. Visit HTCs dev site and register, if you havent already. Follow the steps provided to place your phone into Fastboot mode and request the device ID token required to perform the unlock. Youll need the latest version of the Android SDK to do this, so make sure youve downloaded it beforehand.
Once youve got the token, youll need to input it into the HTC dev site, after which point youll get the code used to unlock the phone, plus instructions on how to do it. During the unlock process youll need to place all related files in a folder. Make sure you place it on your desktop, as youll be putting more stuff in there as part of the next step of the guide.
3. Download TWRP recovery
Grab the latest version of TWRP recovery (currently 2.5.0.0) and place it in the same folder where you downloaded the previous files.
4. Open up a command prompt
Youll need to regress to the world of MS-DOS for this next bit, which might bring back unhappy memories for anyone over the age of 30. Open up the Start menu in Windows and type "cmd" and press enter, then use "cd/desktop/xxxxx" (with the "xxxxx" being the name of the folder) to navigate to the folder where you previously downloaded all the files.
5. Place your HTC One into fastboot mode
Youre prepped PC-side, but now you need to make sure your HTC One is ready for the rooting process to begin. Place the phone into Fastboot mode by turning it off completely and then holding down the Power and Volume Down buttons. Select Fastboot using the volume rocker and press the power button to select it. Now connect your phone to your PC using a Micro-USB cable.
6. Flash TWRP recovery to your HTC One
In the command prompt, type "fastboot flash recovery twrp.img". The TWRP recovery will then be flashed to your phone. After this has completed, restart your phone.
7. Download and install SuperUser
Download the SuperUser application from here and copy it to the root of the phones internal memory. To install it, youll need to boot the phone into recovery mode. Switch off the handset and hold down the Power and Volume Down buttons again. Navigate to Recovery and press the power button. From the next menu, tap Install and then select the SuperUser.zip file you copied across earlier. Once that process is complete, reboot your freshly rooted HTC One and enjoy.
Friday, June 27, 2014
Root Explorer Apk v3 1 6 Android Download Paid

Whats New:
v3.1.6 update:
Included xxhdpi and xxxhdpi launcher icons.
Fixed recognition of 64GB exFAT SD cards when adding external SD card tab.
Fixed Box recurring authentication requests.
Fixed recursive search issue in KitKat when searching internal storage.
Enforce leading slash when entering external SD card path. The omission of this leading slash is what caused problems copying to SD cards for some people.
Using Root Explorer to select files for upload to web sites should now work.
v3.1.6 update:
Included xxhdpi and xxxhdpi launcher icons.
Fixed recognition of 64GB exFAT SD cards when adding external SD card tab.
Fixed Box recurring authentication requests.
Fixed recursive search issue in KitKat when searching internal storage.
Enforce leading slash when entering external SD card path. The omission of this leading slash is what caused problems copying to SD cards for some people.
Using Root Explorer to select files for upload to web sites should now work.
v3.1.6 APK FILE: HERE
v3.1.5 APK FILE: HERE
v3.1.4 APK FILE: HERE
v3.1.3 APK FILE: HERE
v3.1.5 APK FILE: HERE
v3.1.4 APK FILE: HERE
v3.1.3 APK FILE: HERE
Google Play
Features include multiple tabs, Google Drive, Box, Dropbox and network (SMB) support, SQLite database viewer, Text Editor, create and extract zip or tar/gzip files, extract rar archives, multi-select, execute scripts, search, remount, permissions, bookmarks, send files (via email, bluetooth etc), image thumbnails, APK binary XML viewer, change file owner/group, create symbolic link, "Open With" facility, MD5, create shortcuts.
SCREENSHOT
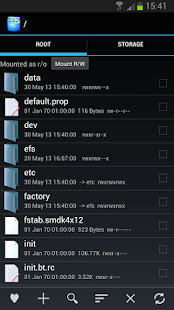
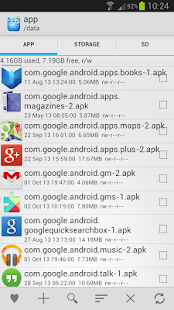
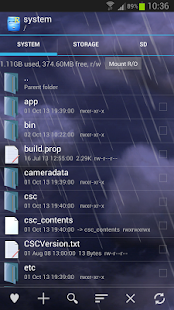
Root Explorer is the ultimate file manager for root users. Access the whole of androids file system (including the elusive data folder!).
Root Explorer v3.1.6
Size: Varies with device | Android: Varies with device
Wednesday, May 28, 2014
GMD SPen Control ★ root Direct v5 4 4 Download Apk Full

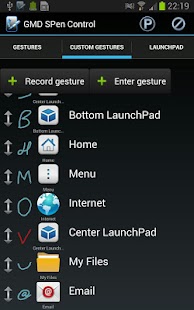
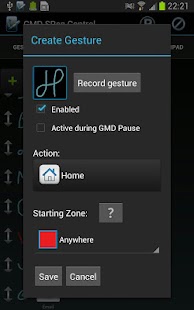
Why limit yourself to a few gestures that Samsung provided? Create your own gestures.
This application is only for Samsung S Pen Stylus. It is compatible and can be used together with GMD Gesture Control - touch screen gestures application.
This application is only for Samsung S Pen Stylus. It is compatible and can be used together with GMD Gesture Control - touch screen gestures application.
Features:
Graphical gestures - create any gesture you like.
Trigger gestures - swipe, hold, tap, can be executed without pressing SPen button.
Disable finger input (gesture) - disable finger input and capacitive buttons anytime in any application. Get rid of accidental zooming/scrolling when using S Pen.
Starting zones - assign different actions for same gesture when starting drawing in different area.
Start any application, shortcut or custom action.
A lot of custom actions to execute.
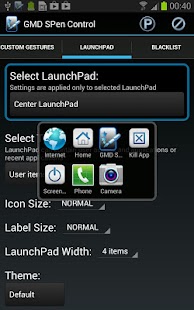
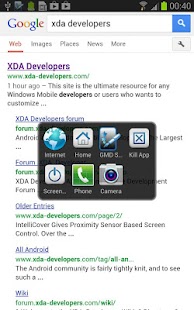
Built in LaunchPads accessible anywhere with your own gesture. Create launch bar on any border or window in center.
S Pen attach/detach triggers (Note 1 does not have this sensor, only works on Note 2, Note 10.1 and Note 8)
Works in any firmware in all applications.
Graphical gestures - create any gesture you like.
Trigger gestures - swipe, hold, tap, can be executed without pressing SPen button.
Disable finger input (gesture) - disable finger input and capacitive buttons anytime in any application. Get rid of accidental zooming/scrolling when using S Pen.
Starting zones - assign different actions for same gesture when starting drawing in different area.
Start any application, shortcut or custom action.
A lot of custom actions to execute.
Built in LaunchPads accessible anywhere with your own gesture. Create launch bar on any border or window in center.
S Pen attach/detach triggers (Note 1 does not have this sensor, only works on Note 2, Note 10.1 and Note 8)
Works in any firmware in all applications.
v5.4.4 APK FILE: HERE
Google Play
Tags: Control, GMD SPen Control ★ root android apps on google play, oad, GMD SPen Control ★ root for android, GMD SPen Control ★ root v5.4.4 full version
Control your Samsung Note device with custom S Pen Stylus gestures.


GMD SPen Control ★ root v5.4.4
Size: 1.8 Mb | Android: 4.0 and up
Wednesday, May 14, 2014
How To Root Gionee Elife E6
Gionee mobile company is a new in Indian market but the mobile phones they are producing are simply awesome. Mostly all of the devices are Dual Core or Quad Core. Gionee Elife E6 is one of the best mobiles released by Gionee. This is an excellent device with a decent price amount. You get everything like Quad Core, Superb RAM etc. Lets see the short list of the specifications first

Specifications of Gionee Elife E6
Specifications of Gionee Elife E6
- 2 GB RAM
- Android 4.2 Jelly Bean
- 1.5 GHz Quad-Core processor
- PowerVR SGX 544MP GPU
- 5 Inch Big Screen with 1080x1920 pixels
- 32 GB Internal Storage
- 13 Mega Pixels rear camera with flash support
- 5 Mega Pixels front camera
- Micro-SIM support
- Compass/ Magnetometer, Proximity sensor, Accelerometer, Ambient light sensor, Gyroscope
- 2000 mAh battery
The device is having great specifics but the GPU is quite low. Thats why games like Asphalt 8, Asphalt 7, Need For Speed Most Wanted, Need for Speed Hot Pursuit, Dead Trigger 2 are having some glitches! Dont know whats wrong but I think the GPU is less, the RAM and Processor are good.
Wait, dont be sad! You can apply tons of tweaks on your device and Im sure that these games will work after rooting Gionee E6. You can try Xposed Framework, Greeify, Geeky Engine, Adrenalin Engine, Seeder and many other tweaks to run your device more smooth and faster. But you cant apply all these tweaks without Rooting! So you need to root your device for gaming and performance.
The device was sold in July and within 1 week, the stock was finished/sold. So you can think how many people bought this. The developers rooted this device in just 5 days after the launch, after all, its an MTK-based device. You can root it without any risk, yep, trust me. Everything will go right but still I wont take your headache (Risk) because I wont came to know that you did everything right. The guide is tested by over 1k people and it worked on everyones device.
How To Root Gionee Elife E6
Lets begin our journey finally, lots of chit-chat! Just follow these steps and do not mix any other guide with this guide because it can result to bricked device!
Downloads and Requirements
- Farmaroot 1.6.0 APK
- E6 charged up to 70%
- USB Debugging enabled [To enable it, first enable Developer Options, you can do this by going to Settings>About Phone and tapping 7 times on Build then go to Developer Options, enable it and turn on USB Debugging.
[Finally] How To Root Gionee Elife E6
- Download the Farmaroot 1.6.0 APK application form the Downloads and Requirements section.
- Install it on your Gionee Elife E6.
- Open the application from your launchers drawer and select Install Super su from the drop down menu.
- Now click on Borimor button.
- Now you will see a message Success :-) Superuser & su binary installed. You have to reboot your device.
- Press OK and restart your E6!
Now you will see a new application named SuperSU in your application drawer, if you saw that, it means you are rooted! You can cross check if it is rooted or not by trying applications like Root Checker.
If you are having any problem at any step, shoot a comment here. Im here for your help!
Buy Gionee Elife E6 at only 25 thousands from Flipkart!
Buy Gionee Elife E6 at only 25 thousands from Flipkart!
Monday, April 21, 2014
Root Cleaner Full v3 0 5 Download Apk

You can choose between quick cleaning and full cleaning. Quick cleaning clears your memory, file cache, etc. and you can do that without reboot. Full cleaning requires reboot, but it makes really total maintenance of your system. Full cleaning is also great when you want to flash other ROM or kernel, so it will clean your device to prevent any problem. Application is also great application manager, you can uninstall, clear data and freeze or unfreeze your system and non-system applications.
download full version apk file Below:
v3.0.5 APK FILE: HERE
Google Play
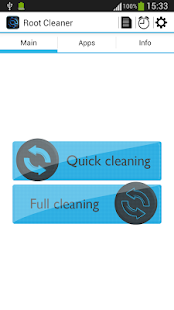
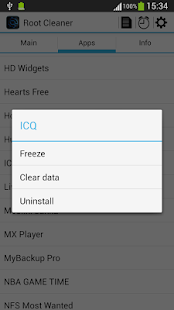
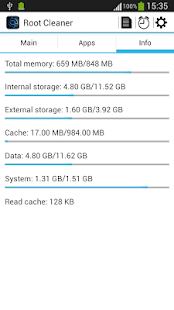
Simple and effective application which a lot increases your peformance by cleaning your system.
Root Cleaner v3.0.5
Size: 874 Mb | Android: 2.1 and up
Tuesday, April 15, 2014
How To Root Motorola Moto X without unlocking bootloader and PC
Earlier we presented a guide on rooting Motorola Moto G and this time, we are preseniting you an easy guide on rooting Motorola Moto X.
Motorola Moto X was stepped in just USA for some months but now its also available in India! Yes, the mobile released in India too. You can buy Moto X from FlipKart now. But the sad thing is that Google sold Motorola Moto X to Lenovo in just some bucks! Not actually sad thing but we knew that Google would provide updates to Moto X and G every time new update the new update rolls but Lenovo would take time to roll an update for Moto X and G because they also need to manage their handsets like Yoga.

Motorola Moto X is the one of the best mobile phones I have seen till the date at this price range. The device is just for 12 thousands rupees in FlipKart (the price will likely to fall to 10 thousands in coming months) and because of its feature, the market is flooded in India.
Motorola Moto X has 4.7 inches capacitive IPS touch screen with HD resolution of 720 x 1280 pixels and 329 ppi pixels density. The screen size is okay, means not too big and not too small, I personally like 5 inches device because they are more handy than 5.5 or 6 inches devices and theres better video experience in it when compared to 3.5 inch or 4 inch device. Best part of this device is processor! The device is powered byMediaTek Qualcomm SnapDragon 400 chipset which is clocked at 1.2 GHz, not dual core, it is a quad-core device. The RAM of this device satisfies the chipset and the OS requirements, the RAM you get in this device is 2 GB which is too much. There are two models of Motorola Moto X, one with 8 GB and second with 16 GB internal storage. With a 10 Mega Pixels rear camera, you can capture amazing photographs and in night, with the bright LED. The front camera is also good, it is 2 Mega Pixels and can record HD videos. It comes with Android 4.2.2 Jelly Bean OS but can be upgraded to Android 4.4 KitKat.
Now lets move to rooting tutorial.
Rooting means gaining superuser permissions to perform actions such as editing system and other partitions which cannot be edited until you have rooted your device in an Android mobile phone. Also you dont need to unlock the bootloader so dont be afraid that the OTAs wont come up! Because bootloader is locked, the device will receive OTA updates. NO! you dont need any kind of USB drivers, USB cable or any other hardware, just a simple application and working brain. The application uses bug 9695860 which is a flaw in the built and the application can easily gain root access by this bug.
Requirements to root Motorola Moto X
How To Root Motorola Moto X
Motorola Moto X was stepped in just USA for some months but now its also available in India! Yes, the mobile released in India too. You can buy Moto X from FlipKart now. But the sad thing is that Google sold Motorola Moto X to Lenovo in just some bucks! Not actually sad thing but we knew that Google would provide updates to Moto X and G every time new update the new update rolls but Lenovo would take time to roll an update for Moto X and G because they also need to manage their handsets like Yoga.
Motorola Moto X is the one of the best mobile phones I have seen till the date at this price range. The device is just for 12 thousands rupees in FlipKart (the price will likely to fall to 10 thousands in coming months) and because of its feature, the market is flooded in India.
Motorola Moto X has 4.7 inches capacitive IPS touch screen with HD resolution of 720 x 1280 pixels and 329 ppi pixels density. The screen size is okay, means not too big and not too small, I personally like 5 inches device because they are more handy than 5.5 or 6 inches devices and theres better video experience in it when compared to 3.5 inch or 4 inch device. Best part of this device is processor! The device is powered by
Now lets move to rooting tutorial.
Rooting means gaining superuser permissions to perform actions such as editing system and other partitions which cannot be edited until you have rooted your device in an Android mobile phone. Also you dont need to unlock the bootloader so dont be afraid that the OTAs wont come up! Because bootloader is locked, the device will receive OTA updates. NO! you dont need any kind of USB drivers, USB cable or any other hardware, just a simple application and working brain. The application uses bug 9695860 which is a flaw in the built and the application can easily gain root access by this bug.
Requirements to root Motorola Moto X
- Motorola Moto X
- PwnMyMoto application (.apk package) from XDA: Click HERE.
How To Root Motorola Moto X
- Download the required application (.apk), given in the downloads.
- Install the application in your mobile phone by simple tapping on it by using any file exploring or typing these commands in command prompt:
adb install PwnMyMoto.apk.
When you are installed with it, then open the application. - It will automatically root the device and will reboot it twice or thrice depending on the system status.
- When the last reboot will take place, the application would automatically uninstall itself and install SU binary files and supersu application in your system partition.
To check if your device has been rooted successful, type these commands in ADB:
adb shell getprop ro.boot.write_protect
or this command in terminal emulator:
getprop ro.boot.write_protect
If the device is rooted then it would display 1 with the answer and if 0 then try any other version of application.
Wednesday, April 2, 2014
Disk Storage Analyzer Root Android v1 6 Apk Download
![Disk & Storage Analyzer [Root] Apk v1.6 Full Version](https://blogger.googleusercontent.com/img/b/R29vZ2xl/AVvXsEhiufrbsCNn9TRKLSOzxe4cTxmvhvGY6x_YyJBScD4Aj5s1dsYFs4RV0xcKzu4_d2CNNXCNrr4J0FaOV5GeDiBfy_5hgktEOBXMjA-fNkJbH-a04HcseVqbVYl3E1N5p_Kf0vg213MXrfE/s1600/Disk+&+Storage+Analyzer+%5BRoot%5D.png "Disk & Storage Analyzer [Root] Apk v1.6 Full Version")
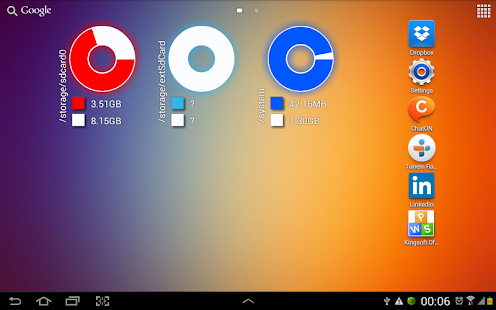
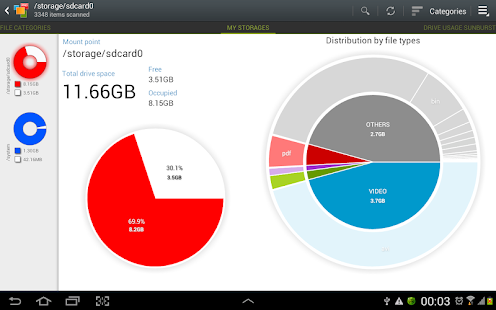
Why does my device should be impersonal? What is inside? How data are intertwined, and how are they related? I do not want to consider about my device as just a set of data. I want to see its inner essence and soul.
Google Play
v1.6 APK FILE: HERE
Tags: Disk & Storage Analyzer [Root] apk, Disk & Storage Analyzer [Root] apk download, Disk & Storage Analyzer [Root] for android, Disk & Storage Analyzer [Root] v1.6 full version
Device Storage Analyser displays information on sdcard, usb devices, sd-cards, external and internal storage in a simple and clear graphical form (infographics). NO ADS, NO VIRUSES.
Disk & Storage Analyzer [Root] v1.6
Size: 411 Kb | Android: 2.1 and up
Thursday, March 20, 2014
How To Root Sony Xperia Z Easily
Sony Xperia Z is the most popular handset of Sony and also it has amazing specifications. But today, I am showing you a guide to boost your Sony Xperia Z by 2x. But how can you do this? By Rooting!

Xperia Z is featured and stuffed with tons of features like 1.5 GHz Krait processor which is a Quad-Core chipset so I am sure that the device doesnt lag much. Also it has got a 5 inch TFT Capacitive Touch Screen, exploited by Sony Bravia Engine 2 and xLoud. Not only this much, the device has many tweaks that are really very cool which improves the device display, camera quality, better and clear speaker. It comes with Android 4.1 Jelly Bean as Stock Android but has received Android 4.2 Jelly Bean update and some other updates too. However you can update your Sony Xperia Z to Android 4.4 KitKat by CyanogenMod 11 ROM which is made by FXP (Free Xperia Project) developer @XDA. But wait, what did you just say? KitKat? Yeah, I said KitKat! But how to do that? You need to root your handset!
The guide is pretty easy and you need not unlock your bootloader and just one click to root! There are many guides which require unlocking bootloader and unlocking bootloader is just work of 5 minutes but it voids the warranty and you also need internet to do so. In this guide you dont need internet, you need it for just two times, one for following this article and second to download OneClickRoot which will root your Android device easily in just some seconds. Lets no more talk about ease and and all and move to our main part of the guide that is How To Root Sony Xperia Z.
Downloads and Requirements
Xperia Z is featured and stuffed with tons of features like 1.5 GHz Krait processor which is a Quad-Core chipset so I am sure that the device doesnt lag much. Also it has got a 5 inch TFT Capacitive Touch Screen, exploited by Sony Bravia Engine 2 and xLoud. Not only this much, the device has many tweaks that are really very cool which improves the device display, camera quality, better and clear speaker. It comes with Android 4.1 Jelly Bean as Stock Android but has received Android 4.2 Jelly Bean update and some other updates too. However you can update your Sony Xperia Z to Android 4.4 KitKat by CyanogenMod 11 ROM which is made by FXP (Free Xperia Project) developer @XDA. But wait, what did you just say? KitKat? Yeah, I said KitKat! But how to do that? You need to root your handset!
The guide is pretty easy and you need not unlock your bootloader and just one click to root! There are many guides which require unlocking bootloader and unlocking bootloader is just work of 5 minutes but it voids the warranty and you also need internet to do so. In this guide you dont need internet, you need it for just two times, one for following this article and second to download OneClickRoot which will root your Android device easily in just some seconds. Lets no more talk about ease and and all and move to our main part of the guide that is How To Root Sony Xperia Z.
Downloads and Requirements
- Charged Sony Xperia Z upto 70% or more.
- Xperia Z with USB Debugging enabled [Go to seconds, follow to Developer options and enable USB Debugging from there.]
- Xperia Zs drivers installed in your PC.
- One Click Root application: Click here to download it from their official website.
How To Root Sony Xperia Z
- First of all, connect your Sony Xperia Z with your PC by USB and also make sure USB Debugging is enabled with drivers installed.
- Download One Click Root and install it on your PC. Its simple installation guide. Just click next, next and you are done with it.
- Open One Click Root on your PC and click on that big Green Root button that is on the Mid-Bottom left side.
- It will open a popup and will display Sony Xperia Z in it, just click on it. It is to make sure that you want to root this device only or not.
- It will start rooting process and your phone will root twice or thrice in this process.
- You are done with it now. When the device will reboot last time, then it is rooted!
Open your application drawer and swipe it right or left to check the new application superuser. If the application is installed in your Xperia Z, then you are rooted. Also you can cross-check if it is rooted or not by using Root Checker application. This application is 100% free and you dont need to pay for it. If the results are positive then you are rooted if it fails then you might not have installed your drivers properly or something else went wrong. Just try it again if you failed but you are sure that drivers are working.
Subscribe to:
Posts (Atom)